

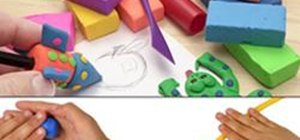
Polymer clay is an exciting arts & crafts medium. Actually, "clay" is a misnomer; it contains no true clay, but rather consists of tiny particles of polyvinyl chloride (PVC) combined with plasticizer, which is what makes it malleable like clay.
What makes it so "exciting? Well, for starters, it's available in literally dozens of colors, and you can blend them together to create your own unique hues. Since it's so ductile, you can employ methods borrowed from such varied arts as sculpture, glass blowing, textiles, etc. And perhaps best of all, unlike natural clay, it never dries out on its own, allowing you to leave your work and finish it at any time you choose. Firing permanently solidifies the clay - and another great aspect of the material is that it hardens at low heat, which means you don't need an expensive kiln: Even a toaster oven will do!
The kinds of work you can do with polymer clay is limited only by your imagination: You can make small sculptures, embellish wooden boxes, picture frames & mirrors (it can be applied to any surface that can withstand the relatively low heat needed to cure the clay). One of the most popular uses is to make unique jewelry of all kinds.
Here are the basics that will help you get started with polymer clay:
WHERE TO GET IT
Any art & crafts store should carry a wide selection of polymer clays. Some toy stores have it, but their choice range is likely to be narrower. There are several brands to choose from, each with its own properties of softness & durability. The clay usually comes in 2 oz. or 12 oz. packages. Depending on the maker, smaller quantities usually sell for about $1.50 to $3.00.
EQUIPMENT NEEDED
You don't actually need any tools to started; just an oven & your hands. However, polymer clay artists often do use a few simple tools to help in working the clay: Needles or skewers for piercing; a smooth-edged knife to cut the clay, etc. (knives used for this purpose shouldn't be used on food, however).
One important thing is to protect the work surface from the clay: The plasticizers in the clay can damage wood & plastic. A cheap & effective way to prevent this is to cover the work surface with wax paper: Simply throw away the paper when it gets dirty or torn. You can also buy a piece of glass or marble (with smooth surface & dull edges), but why do that just to begin with?
READY.... SET.... CREATE!
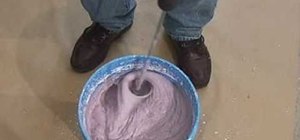
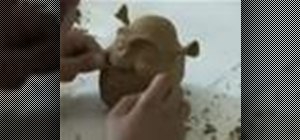
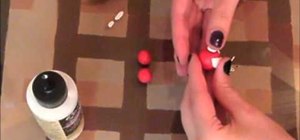
Take some clay and start kneading it to make it soft & pliable. Roll it into a ball, an elongated "snake", etc. Make anything you want: The whole point is to have fun getting a feel for the material and experimenting with form.
To cure the clay, you first need to to know your oven's true temperature: The stated temperatures are often incorrect. Get a stand-alone thermometer and set it in the center of the oven (this is where you should place your completed pieces). Set the dial to the desired temp for the correct time, compare with the thermometer reading, and adjust accordingly.
The various brands of polymer clay have different curing temperatures, so read the packages for those. Generally speaking, a piece should bake for about 30 minutes for every 1/4" of clay used. If you like, you can bake pieces numerous times at various stages of their creation. Lightly cover you pieces with aluminum foil. Bake in well-ventilated rooms, as the fumes can irritate some people. When they're finished curing, allow the pieces to cool in the oven before taking them out.
Well, that's enough knowledge to get you off to a good start. Have fun!
Just updated your iPhone? You'll find new emoji, enhanced security, podcast transcripts, Apple Cash virtual numbers, and other useful features. There are even new additions hidden within Safari. Find out what's new and changed on your iPhone with the iOS 17.4 update.


Be the First to Comment
Share Your Thoughts